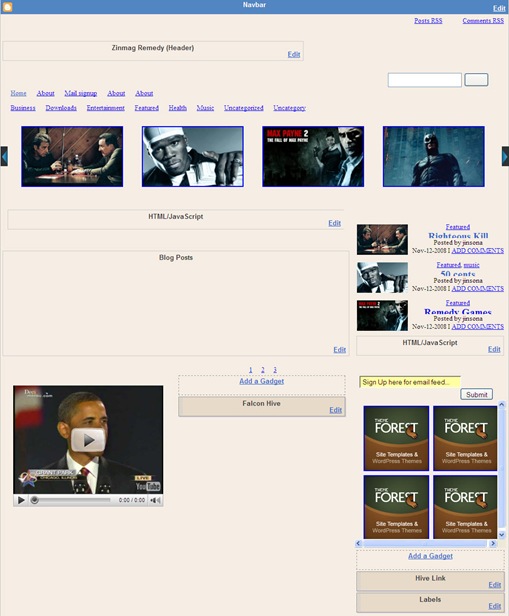
Suggested by msplash9 in Template Suggestion #1, Zinmag Remedy Blogger template is a true professional magazine template with extremely unique features. Discover this feature-rich dark Remedy to make it your ultimate template!
Template name: Zinmag Remedy
Template Author: Jinsona Design
Template Converter: Falcon Hive
Compatible BSP: Blogger
Best viewing Browser: Internet Explorer 8, Firefox RC3, Opera 9.6, Google Chrome 0.3.154.9
Template Author: Jinsona Design
Template Converter: Falcon Hive
Compatible BSP: Blogger
Best viewing Browser: Internet Explorer 8, Firefox RC3, Opera 9.6, Google Chrome 0.3.154.9
Featured included:
- Dark professional magazine style design
- 2 Navigation Bar
- Welcome Message
- 3 Feature Content section
- 2 RSS Subscribe section
- 3 Ads section
- Video section
- 4 Footer Gadget
You can observe the Demo of Zinmag Remedy Blogger Template (v2.0) or download the Zinmag Remedy 2.0 Blogger Template.
Layout view
Set up the First Header Navigation Bar
You can customize your header navigation link to your own preferred link. To achieve this, access into ‘Layout’ and under the ‘Edit HTML’ tab, press [CTRL+F3] to find the code below and change the yellow-highlighted code to your link.
<li><a href=’#’ title=’#'>Edit</a></li>
Set up the Second Navigation Bar
There’s got a second navigation bar on the header, you can customize it with your own preferred link. To get this done, go to ‘Layout’ and under the ‘Edit HTML’ tab, press [CTRL+F3] to find the code below and change the yellow-highlighted code to your link.
<li><a href=’#’ title=’#'>Edit</a></li>
Set up the ‘Feature Slide Carousal’
You can see this template got a sliding carousal of featured post image on the top of the page, which can only be configured through ‘Edit HTML’ section.
To setup the slide carousal, simply access into ‘Layout’ and under the ‘Edit HTML’ tab, check the ‘Expand Widget Templates’, then press [CTRL+F3] to find the code below and edit it with corresponding item:
<a href=’YOUR-POST-LINK’ title=’YOUR-POST-TITLE’>
<img src=’POST-IMAGE-LINK.jpg’ width=’200′ height=’120′ alt=’#'/>
</a>
<img src=’POST-IMAGE-LINK.jpg’ width=’200′ height=’120′ alt=’#'/>
</a>
Set up the ‘Featured Content’
There’s also got a wide space under the sliding carousal, which you can only access into the space through the ‘Layout’ or ‘quickedit’ button.
To setup the featured content, simply copy the code below, then access into ‘Layout’ and under the ‘Page Element’, clicks on the ‘Edit’ of the ‘featured content’, paste and edit the code with the corresponding item:
<h2><a href=’YOUR-POST-LINK’ title=’YOUR-POST-TITLE’>YOUR-POST-TITLE</a></h2>
<p>You can put some part of post content here.</p>
<p>You can put some part of post content here.</p>
Set up the Main Page’s Ads Space
Zinmag Remedy template got an ads space under the top featured content section, and you can setup the ads space with Google Adsense Ad Unit 468×15 Ads. To achieve this, simply access into ‘Layout’ and under the ‘Edit HTML’ tab, press [CTRL+F3] to find the code below and paste your Adsense ads code between the <!– Google Adsense Code Start –> and <!– Google Adsense Code End –>.
How to hide article’s content on the main page
As this template got ‘Read More’ function, you probably want to hide some text from being displayed on the main page. In fact, you just need some extremely easy step to achieve this. Simply copy the highlighted code below, then access into ‘Settings’ and under the ‘Formatting’ tab, paste the code into the ‘Post Template’.
On the next time you write an article, you just need to add this line of code to hide the text. For example,
Set up the ‘Video of the day’
There’s a video section on the bottom of the mini post section, and you can put favorite Youtube video inside the section by just few simple steps.
To setup your favorite Youtube video, just copy the video’s embed code link, then access into ‘Layout’ and under the ‘Page Element’, clicks on the ‘Edit’ of the ‘video-entry’, paste the code then ‘Save’ to show the video!
Your Youtube video’s embed code link is located below the profile of the video uploader, and you can adjust the (embed)’s width and height inside the code to fix the section size.
Set up the Tabber
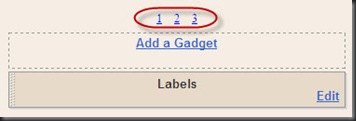
You can probably notice that there’s got gadget with number ’1′, ’2′ and ’3′ in the layout. By clicking the ’1′, you can actually set up the first part of the tabber with any gadget, same as clicking ’2′ and ’3′, which directs you to the setting of second and third part of the tabber.
Set up the ‘Highlight Reel/ Featured Content’
There’s actually got another featured content section installed on the top of the sidebar, which you can only access into the section through the ‘Layout’ or ‘quickedit’ button.
To setup the featured content on the sidebar, simply copy the code below, then access into ‘Layout’ and under the ‘Page Element’, clicks on the ‘Edit’ of the ‘featured content’, paste and edit the code with the corresponding item.
<img src=’YOUR-IMAGE-LINK’ width=’100′ height=’60′ alt=”/>
<div class=’fcats’><a href=’YOUR-CATEGORY-LINK’ title=’YOUR-CATEGORY-TITLE’ rel=’category’>YOUR-CATEGORY-TITLE-HERE</a></div>
<h2><a href=’YOUR-POST-LINK’ title=’YOUR-POST-TITLE-HERE’>YOUR-POST-TITLE</a></h2>
<div class=’auth’> Posted by Author </div>
<div class=’fmeta’> POST-DATE |
<a href=’YOUR-POST-LINK’ title=’Comment on YOUR-POST-TITLE’>ADD COMMENTS</a>
</div>
Set up the 125×125 Ads
You can change the 125×125 ads image to your own ads image. To achieve this, simply access into ‘Layout’ and under ‘Edit HTML’ tab, press [CTRL+F3] to find the code below and edit the code with corresponding item.
<a href=’YOUR-TARGETED-LINK’ rel=’bookmark’ title=’YOUR-ADS-TITLE’><img src=’YOUR-IMAGE-LINK’ alt=’#'/></a>
Set up the Email Subscribe button
You can personalize the email subscribe button to your own personal RSS. To get this done, access into ‘Layout’ and under the ‘Edit HTML’ tab, press [CTRL+F3] to find the code below and edit it with corresponding item.
‘http://feeds.feedburner.com/~e?ffid=YOUR-FEEDBURNER-ID’
Set up the Content page’s Ads Space
Zinmag Remedy also got an ads space under every single post, and you can setup the ads space withGoogle Adsense Ad Unit 468×60 Ads. To achieve this, simply access into ‘Layout’ and under the ‘Edit HTML’ tab, press [CTRL+F3] to find the code below and paste your Adsense ads code between the <!– Google Adsense Code Start –> and <!– Google Adsense Code End –>.
Zinmag Remedy is sponsored by PSPrint.com
Zinmag Remedy is sponsored by PsPrint.com where you can find Wholesale printing .
We care about Author
Zinmag Remedy template (Blogger) comes under a Creative Common License. This means it is free to use on your blog as long as the credit link in the footer is kept intact. Jinsona Design has really put so much effort on designing this template, so if possible you can pay a visit to the site and leave a thankful comment!
What I want to say is, Incredible!
Zinmag Remedy is undeniably the most complicated theme I have converted ever. However, it’s very worthy as the piece has not only improved my conversion skill and understanding to Blogger’s xml, but also provide a professional layout for the extremely serious Blogger to shine their blog!
As this is the final piece for year 2008, we want to say thank you for all your support and suggestion to Falcon Hive. It’s been a long journey through, but we are not going to stop here. Hive would evolve into a bigger existence to bring more template and joy for every blogger, see you next year!
Happy New Year and Comment Sharing!


Tidak ada komentar:
Posting Komentar